Windows apps
Microsoft has sowed enormous confusion with a set of lightweight apps that were originally designed for the Windows 8 touch-oriented Start screen interface. It first called them Metro apps, and then through the years changed their names to Modern apps, Windows Store apps, and then Universal Windows apps. Now it's settled simply on Windows apps, although at times the company also calls them Universal Windows apps. In this article, I'll refer to them as Windows apps.
What about apps designed for the desktop? Microsoft now calls them Windows desktop applications. In this article I'll call them desktop applications for simplicity's sake.
In Windows 8, Windows apps and the desktop didn't get along. Windows apps could only be run from the Start screen, not from the desktop. What's more, they didn't appear in traditional application windows; you could only run them full-screen or side by side with another Windows app (but not a desktop application) so the two apps filled the full screen. That meant you couldn't have multiple Windows apps running in separate windows on the desktop alongside desktop applications. It was just one more way in which Windows 8 felt like two separate operating systems.
That's no longer the case in Windows 10. You can resize, minimize, and close Windows apps in the same familiar way as desktop applications. Drag the edges of a Windows app to resize it. Use the familiar icons on the upper right of the app window for minimizing, maximizing, and closing the app.
 IDG
IDG
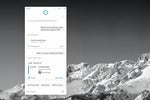
In Windows 10, Windows apps can be resized, minimized, and closed in the same way as desktop apps.
Windows apps also get a better way to access all their features. On the left side or bottom of the app window, you'll typically see a series of icons for the different features in the app. The icons change depending on the app. For example, the Weather app has icons for pollen counts, maps, historical weather in your location, and so on.
Most of the apps show useful information by default, but it’s worth investigating the customization options for each app. To customize the News app so it shows exactly the kind of news you’re interested in, for instance, click the icon that looks like a star with a row of lines next to it — it’s two icons below the home icon. Once you do that, you’ll be able to tell the app your news preferences — US News, World News, Business News, Sports, Technology, Entertainment, and so on.
You can set up the Mail app to work not only with Outlook.com, Microsoft’s web-based mail service, but also with other web-based services, including Gmail. To add an account after you launch Mail, click Accounts, and on the “Manage accounts” screen that appears, click Add Account. Then select the kind of mail account you want to add (Outlook.com, Office 365, Google, Yahoo, iCloud POP and IMAP mail, and so on) and follow the prompts. For web-based accounts, it’s straightforward. For POP and IMAP accounts, you’ll need your account information ready, including POP and SMTP server names and passwords.
You can also combine mail from multiple accounts into a single, unified inbox. To do it, click Accounts > Link inboxes and combine the accounts you’d like.
The Calendar app will connect to your mail accounts automatically and display their calendars. For example, if you set up both an Outlook.com account and a Gmail account in Mail, the calendars associated with them automatically appear in the Calendar app.
Note that some time in 2024, Windows Mail and Calendar will be replaced by Microsoft Outlook. If you want to try it before it’s released, move the Try the new Outlook slider on the upper right of the screen to On.
Windows 10 on a tablet or 2-in-1
One of Windows 8's biggest drawbacks was that it forced people with desktop computers to use an interface designed for tablets. In Windows 10, Microsoft changes that with a feature called Continuum that automatically senses the device you're using and switches Windows 10's interface to match it — the Windows 8-like Start screen for tablets, and the desktop and Start menu for laptops and desktops.
Continuum works dynamically. If you're using a tablet with a keyboard attached, such as a Microsoft Surface, it displays the desktop interface, but if you detach the keyboard, it asks if you want to switch to tablet mode, which uses the Start screen interface. Tap Yes to switch to tablet mode. Similarly, if you're using a tablet and attach a keyboard to it, a notification appears asking if you want to switch out of tablet mode.
 IDG
IDG
Windows 10 senses when you detach a keyboard from a 2-in-1 device and asks if you want to switch to tablet mode.
If you don't want to be bothered by the notification again, select Remember my response and don't ask again. From then on, you'll switch automatically from desktop to tablet mode and back again depending on whether you have a keyboard attached to your device. No notification will appear. If for some reason you like those notifications, instead select Always ask me before switching.
You can also manually switch in and out of tablet mode via an icon in the Action Center, which I'll cover later in the story.
Tablet mode in Windows 10 works much like Windows 8 used to work, with the usual touch and swiping gestures. As with Windows 8, there's no desktop but instead the Start screen with groups of tiles that represent your apps — the same tiles grouped in the same way as they are on the desktop's Start menu, except here they take up the full screen. Tap any tile to launch it. You can scroll through the tiles, but note that they scroll vertically rather than horizontally as they did in Windows 8.
 IDG
IDG
Tablet mode in Windows 10 features the Start screen, which will be familiar to Windows 8 users.
There are some other differences between the Start screen in Windows 10's tablet mode and the old Windows 8 Start screen. On the left side of the screen you’ll find six icons, three grouped at the top and three at the bottom.
At the top is a hamburger menu, which doesn’t serve much purpose. Tap it, and the left-hand side of the screen turns black, and all six icons get text labels. Tap it again, and the labels and black screen go away. Just beneath the hamburger menu is the pinned tiles icon — tap it to see the Start screen filled with tiles, which is the default tablet interface. Below the pinned tiles icon is the All Apps icon. Tap it and instead of seeing pinned tiles, you get a full-screen all apps view that lets you scroll through all of your apps and desktop applications to quickly find one you want.
 IDG
IDG
You can see the all apps listing even on a tablet.
Down toward the bottom of the screen are three icons that will be familiar to those who use the desktop and laptop interface: One for your user account, so you can sign out of Windows, lock your PC, switch to a different user account, or change your account settings; one that gets you to the Settings app; and a power icon that that lets you put your tablet to sleep, shut it down, or restart it.
You can also auto-hide the taskbar when you're in tablet mode, even if you hadn't hidden it in desktop mode. To auto-hide it in tablet mode, go to Settings > System > Tablet Mode and switch on the setting Automatically hide the taskbar in tablet mode.
The Edge browser
With Windows 10, Microsoft finally bid goodbye to Internet Explorer. Support for IE ended in June 2022, and the legacy browser has been disabled on most Windows 10 installations. ’’The browser of today and tomorrow is Microsoft Edge.
The Edge you see in Windows 10 today, though, is very different than the Edge that was first released with Windows 10 in July 2015. In January 2020, Microsoft killed the old version of Edge and released a new version based on open-source Chromium code, which was first developed by Google and also underpins Google Chrome and other browsers including Opera and Brave.
The old version of Edge was filled with kludgy features that no one wanted, such as being able to read e-books and mark up and share web pages. That version also had very few extensions — fewer than 300, compared to many thousands for Chrome.
The new Chromium-based version of Edge has eliminated many unnecessary features from the old Edge, so it’s a far cleaner, simpler, faster browser and can use the many thousands of extensions written for Chrome. (For a hands-on review, see “Microsoft’s new Edge browser: Third time’s the charm?”) If you’ve stayed away from Edge in the past, you might want to give it a second look.
 IDG
IDG
The Chromium-based version of Edge is simpler, cleaner, and faster than the original version of the browser.
Edge works much like all other browsers. The upper left has arrows for going forward, back, and reloading a page. Type URLs in the address bar or use the address bar as a search box by typing in search terms. Favorites are accessed via the icon of a star with three horizonal lines at the top right of the screen. To access advanced features, click the three-dot icon on the top right of the screen, and you’ll be able to do things like change settings, view your downloads, see your history, control extensions, and so on. Add Favorites by clicking the icon of a star on the far right of the address bar.
For some, the biggest improvement in the browser is its ability to use extensions written for Chrome. You can get extensions from the Chrome Web Store, the Microsoft Edge Addons site, or from individual web sites.
To manage your extensions, click the three-dot icon at the far right of the screen, then select Extensions. You’ll come to a listing of all your installed extensions. Click any extension to customize it or use some of its features. For example, if you use the Ghostery ad blocker, when you click its icon you’ll be able to turn it off temporarily, turn if off for specific sites, turn it back on, and more. Click the three-dot icon to the right of any extension to remove it from Edge, hide it on the toolbar, view its web permissions, and so on.
Underneath the listing of extensions, click Manage Extensions to get to a page that lets you turn on or off any extension or remove it. You can also get more details about each extension here.
Edge also has a very useful privacy feature called tracking prevention, which blocks ad providers from tracking you from website to website. That makes it more difficult for companies to build comprehensive profiles of your activities and interests.
By default, it’s turned on. But you can customize how it works, making it less or more restrictive by balancing how much privacy you would like when browsing the web with how much you want to see ads and content that mirror your interests.
To do it, click the three-dot icon at the top right of Edge’s screen and select Settings > Privacy, Search, and Services. You’ll see these three choices:
- Basic. This allows most trackers and blocks only those that Microsoft considers harmful. You’ll have less privacy but will be more likely to see personalized ads and content.
- Balanced. This blocks many trackers and is more restrictive than Basic. This is Edge’s default setting. You’ll have more privacy than with Basic, but ads and content will be less likely to be personalized. And like Basic, it blocks harmful ads. With both Balanced and Basic settings, the websites you visit will work as you expect them to.
- Strict. This blocks the majority of trackers from all websites, as well as harmful ads. You’ll have the most privacy, and ads and content will probably have minimal personalization. Parts of websites may not work properly when you choose this setting.
You can customize tracking prevention even more by clicking Exceptions. That lets you specify sites on which you’d like to allow all trackers. Edge also allows you to see which ad trackers it has blocked. Click Blocked trackers to see them. You can also see which trackers have been blocked on any website you’re currently visiting. To do it, click the lock icon to the left of the URL, then click Trackers at the bottom of the menu that appears.
Here’s where you customize Edge’s tracking prevention.
You can also run websites like Facebook or Computerworld as standalone apps, without having to run Edge itself. When you’re on a website you want to run as an app, click the three-dot icon at the top right of the screen, then select Apps > Install This Site as an App and click the Install button. When you do that, the website will show up in your Windows 10 app list (and you can pin it to the taskbar) like any other app. Just click the app’s icon, and the website will be rendered by Edge with all of its functionality, but it will work as its own app without any other Edge features.
You can also run the app by selecting Apps from Edge’s three-dot icon, then clicking the app from the menu that appears. To delete any app you’ve installed, click Details underneath the app listing and click Uninstall on the bottom of the screen that appears.
OneDrive in Windows 10
Microsoft includes its OneDrive cloud-storage service along with Windows 10. If you’ve bought a computer with Windows 10 on it, it’s already installed for you. When you sign into your Microsoft account, you automatically log into it. If you don’t use a Microsoft account to log into Windows, you can log into OneDrive by clicking on its cloud icon on the taskbar and using your Microsoft account information to log in. You need a Microsoft account to use OneDrive.
If you’ve upgraded to Windows 10 on a PC, when you run Windows 10 for the first time, you’ll get a notification that OneDrive is available. Click the notification to begin the setup process. If you don’t want to use OneDrive, dismiss the notification. If you later want to set it up, look for the OneDrive icon on the taskbar and click it. If you don’t see the icon, type onedrive into the Search box and you’ll be able to set it up.
Before using OneDrive, you should know the lay of the land. OneDrive lives in the cloud, but you can choose to sync its files and folders to your local PC. You'll have a choice to sync all of your existing OneDrive files and folders to your Windows 10 PC, or just some of them. Syncing happens automatically, without you having to do anything.
In Windows 10, you get to your OneDrive via File Explorer. By default, this shows you OneDrive files and folders that live on your PC — those that you’ve chosen to sync. If you instead want to see OneDrive in the cloud, go to onedrive.com. Alternatively, OneDrive Files On-Demand lets you see and access all your OneDrive files, even those stored in the cloud, from File Explorer. I’ll explain how to use that feature below.
 IDG
IDG
OneDrive in Windows 10 with One Drive Files On-Demand enabled. Icons next to files show which are local, which are in the cloud, and which are syncing.
With all that in mind, let's go back to setup. When you first set up OneDrive, you'll be asked whether you want to sync your entire cloud-based OneDrive to your local PC, or only individual folders. If you choose individual folders, you'll be able to pick and choose which to sync.
You’re not stuck with that decision forever, though. Let’s say that you've chosen only to sync some folders, and later on you decide you want to change them — add some folders to sync and remove others. To do it, right-click the OneDrive icon in the taskbar, select Settings, go to the Account tab, and click Choose folders.
A screen appears. If you want to sync all folders, check the box next to Make all files available. If you instead want to sync only some of them, uncheck that box, then check the boxes of those folders you want to sync and uncheck the boxes of those you don't want to sync.
 IDG
IDG
You can choose which folders to sync in OneDrive.
A word of advice about using OneDrive: I suggest that if you're going to use it as your primary local and cloud storage that you rethink your folder structure. Over the years, Microsoft has nudged or pushed you into using various folder structures, such as organizing everything in Documents, or in Libraries. That’s problematic with OneDrive, because if you do that, you won’t be able to easily sync them with OneDrive.
So if you become serious about OneDrive, I recommend organizing everything under your OneDrive folder. That way, when you create new files and folders on your PC, they’ll automatically sync up to the cloud.
Using OneDrive Files On-Demand
OneDrive Files On-Demand is great for people who have multiple PCs, because it gives you access to all of your OneDrive files on every device, without having to download them first.
Turning on One Drive Files On-Demand makes it easier to save space on local hard drives while still giving you access to all the files you need. That way you can buy a less expensive laptop with less storage than you would normally need, because it’s easy to access all of your OneDrive files, even with a modest amount of local storage.
To use it, first make sure it’s turned on: Click the OneDrive icon on the right side of the taskbar, click the Settings icon (it’s in the shape of a gear), click Settings on the screen that appears, click the Sync and backup tab, click Advanced settings in the Files On-Demand section towards the bottom, and click Free up disk space in the Files On-Demand section.
When you do that, you’ll set all of the files on your PC to be available in the cloud rather than on your PC. In File Explorer, every file will have a cloud icon next to it, indicating it’s in the cloud, but available for you to download. Double-click it to download it from the cloud and open it. Instead of displaying the cloud icon, it will now show a small blue circle with a checkbox in the middle of it, indicating it’s available on your PC as well as the cloud.
As you browse your PC, icons next to each file or folder indicate whether it is stored only on the web (the cloud icon) or on your PC as well (the checked circle icon).
If you double-click a file in File Explorer that’s on your PC or in both locations, you open it from your PC. If you double-click one that’s only online, it gets downloaded to your PC, and you work on it locally. From that point on, it’s available on both your PC and OneDrive and syncs to both.
You can easily change the status of any file or folder from local to cloud storage or vice versa. To do it, right-click the file or folder. Then select Always keep on this device if you want to download the file or folder to your PC, or select Free up space if you want to remove it from your PC to get more storage space but still keep it in OneDrive on the web.
This works in applications as well as in File Explorer. So files from OneDrive on the web show up in Microsoft Office, and when you open them, they get downloaded for use on your PC.